Here's Exactly How To Pixie Diffuse Your Curls
We may receive a commission on purchases made from links.
Sometimes, hair can be challenging to manage, and finding the right techniques to take care of it can be overwhelming. But thanks to the work several hair enthusiasts have done and TikTok, on which people share several haircare techniques, you now have better, more efficient ways to manage your hair. A great way of caring for curly hair is by diffusing, which is when you use a diffusing attachment with your regular blow dryer to gently dry and add volume to your hair. There are several ways to diffuse, including hammock diffusing — when you use a silk scarf to hold the hair while blow drying — and hover diffusing, which involves keeping the diffuser about 6 inches away from your hair (via The Curl Story). Now, one of the diffusing techniques that has gone viral on TikTok is pixie diffusing. And, yes, you can do this on any hair length, not just on pixie cuts as the name might imply.
Pixie diffusing is a great way to dry hair while reducing frizz and flyaway hair as it concentrates low heat to the roots of your hair, thus diffusing the heat from the root to the tip. Pixie diffusing is also a great way of finding out your hair's actual texture, whether wavy or curly. So, if you ever wondered how to get your curls looking their best with low heat or wanted to know what your curl pattern really is, here's a step-by-step guide to pixie diffuse your own hair at home.
Prep your hair before diffusing
Other than how the technique cuts frizz down by half and reveals your natural curl pattern, our favorite thing about pixie diffusing is how it only requires three things: your blow dryer, a diffusing attachment, and your usual hairstyling products. Like in many other hair techniques, you want to start off with freshly washed hair. While hair is still wet, thoroughly apply your favorite leave-in conditioner and curl mousse through your strands. We recommend the Camille Rose Curl Love Moisture Milk, which boasts a rating of 4.5 stars at Ulta Beauty, and the Shea Moisture Coconut & Hibiscus Frizz-Free Curl Mousse, which has a rating of 4.1 stars.
Follow your leave-in conditioner and curl mousse up with a heat protectant like the Design Essentials Agave & Lavender Thermal Protectant Crème. However, if you're going for a more natural, I-woke-up-like-this look, NaturallyCurly warns that the silicones and additives in your heat protectant may hinder the look. After applying the leave-in conditioner, mousse, and/or heat protectant, trim your dead ends a bit as they become more noticeable after diffusing (via Johnny Rodriguez Salon).
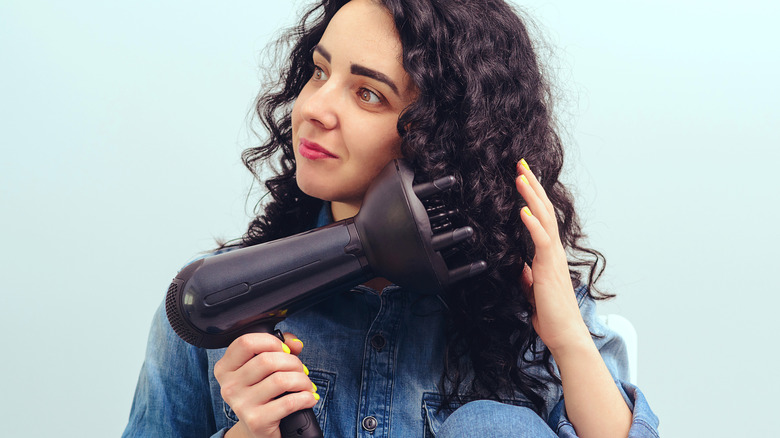
Work in sections to prevent frizz
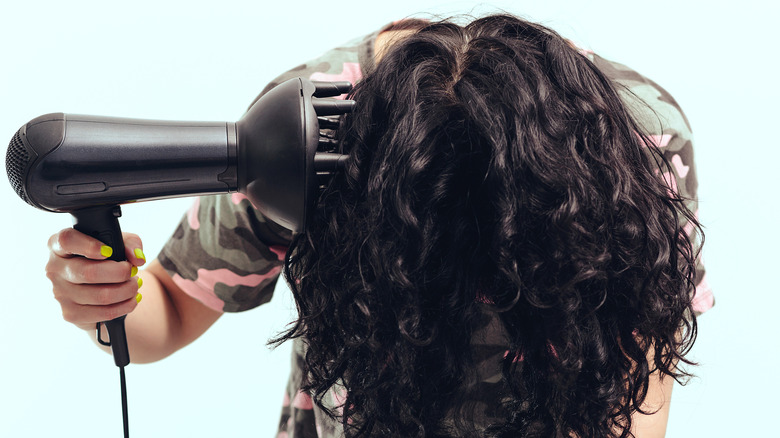
Now, it's time to diffuse. First, you need to flip your hair upside down or tilt it sideways (via Raw Hair Organics). Doing this ensures you get to the root of your hair and adds volume to your tresses. You also want to work in sections while pixie diffusing by gathering parts of your hair into the diffuser bowl and holding it close to your scalp. Remember, the bigger the bowl, the better (via Terrific Tresses). Set at cool heat and low speed, and turn on the dryer while holding it close to your scalp for 30 seconds. Now here's where the frizz goes to rest: turn off the dryer before taking your hair out of the bowl. This will prevent your hair from moving around a lot and creating flyaways. Gather another section of your hair into the diffuser bowl, turn on the dryer, hold close to the scalp for thirty seconds, then turn off the dryer before removing the section. Repeat on all sections of your hair until it is 80% dry. Then, leave it to air dry (via Merwave).
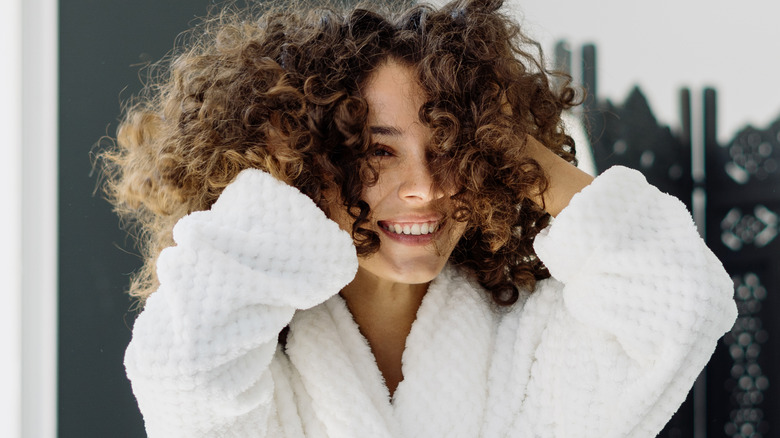
When you're done, gently fluff out your roots with your fingers to add extra volume to your hair. Finish up by scrunching your hair with lightweight hair oil or serum like the Garnier Ultimate Blends Coconut Hair Oil to improve the luster and feel of your freshly diffused curls.